This article explains how to install the White Label Channel Manager within your software with minimal development. You will learn how to generate authorization tokens, request the necessary HTML or script, and embed the solution into your platform to provide a seamless experience for your clients.
Before you start
Before you begin the installation, ensure you complete the "Integrate & Certify" and "Set up accounts" stages. The subuser account must be assigned to a master account in the Rentals United system for the White Label Channel Manager to function correctly.
Technical prerequisites
The following elements are needed to start the installation process for the first user:
- jQuery 3.4.1 or newer: This is required for the application to run correctly.
- Bootstrap v3.3.7: The White Label Channel Manager is bundled with these styles. You can't use other Bootstrap versions on the same page.
- Dedicated section: Create a new, dedicated area in your software solely for the White Label Channel Manager.
- IP Whitelisting (optional): You can request to whitelist your server IP on the Rentals United side.
Authorization
To display White Label Channel Manager in you page, you must first generate master tokens and then use them to obtain subuser tokens.
Step by step:
- Generate a Master Token and Master Refresh Token using your master account credentials.
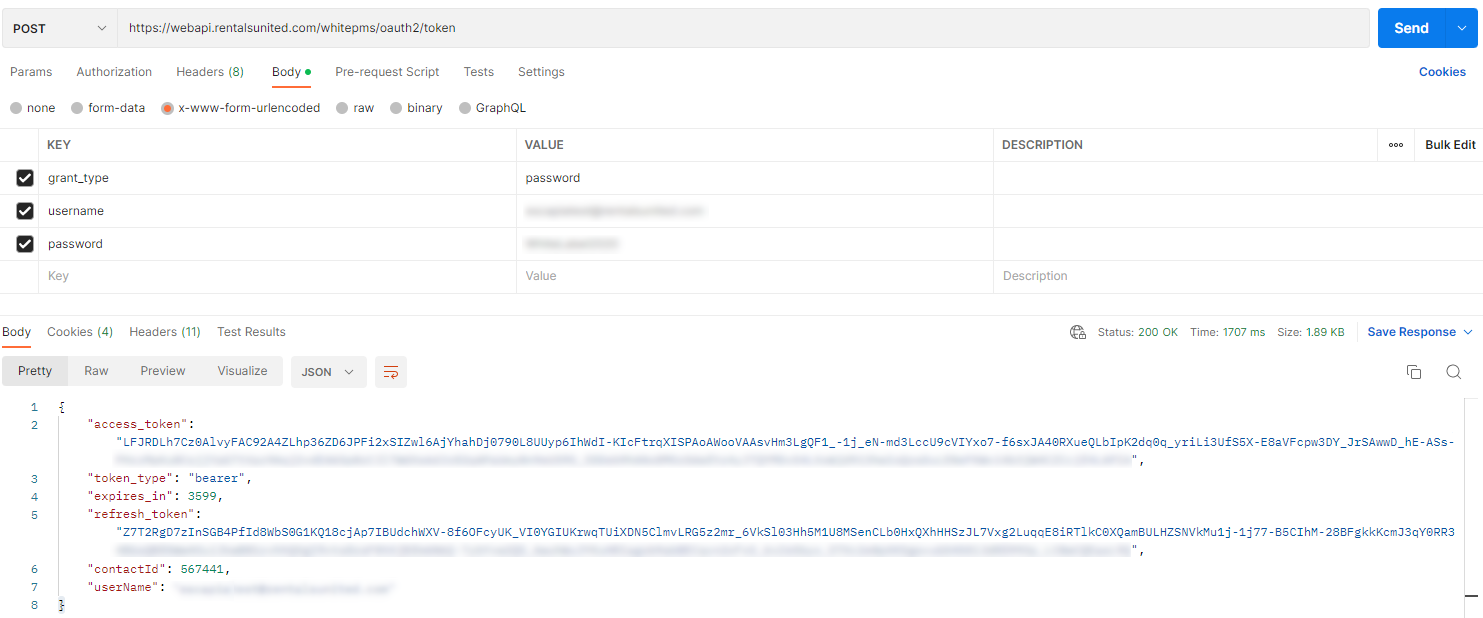
- Send a POST request to: https://webapi.rentalsunited.com/whitepms/oauth2/token.
- Use the following body parameters:
- grant_type: password
- username: [PMS master account username]
- password: [PMS master account password]
-
Save the access_token and refresh_token from the response.
Refreshing tokens
You are responsible for keeping tokens refreshed so your clients can access the product at any time. We recommend developing an automated solution to refresh tokens while they are still valid. This prevents service interruptions for your subusers.
Installing White Label Channel Manager
You can choose between two installation methods: requesting the full HTML code or using a one-line script.
Option 1: Request HTML code
This method involves requesting the HTML block and injecting it directly into your page.
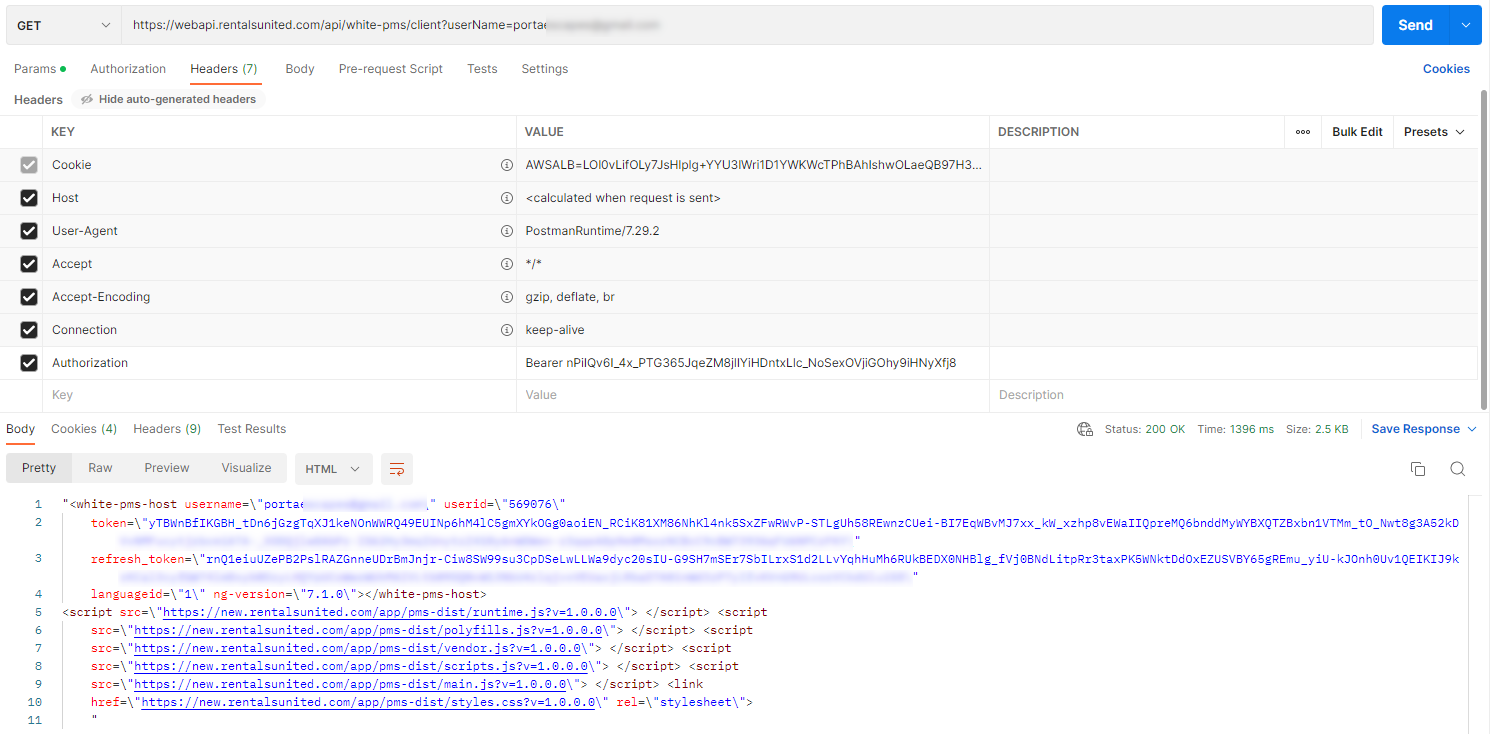
- Request the HTML code from our WebAPI.
- Send a GET request to: https://webapi.rentalsunited.com/api/white-pms/client?userName=[USER_NAME]&ownerId=[OWNER_ID].
- [USER_NAME] - client account username
- [OWNER_ID] - optional; it allows the master account to load the page for a given subuser (Owner ID) and view their inventory and connections. You can obtain the list of Owner IDs through Pull_ListAllOwners_RQ.
- Use the following header:
- Authorization: Bearer [master access_token]
-
Copy the following details from the response.
- "token": Subuser Access Token
- "refresh_token": Subuser Refresh Token
- White Label Channel Manager HTML
- Inject the HTML code into your software where you want the White Label Channel Manager to appear.
-
Copy the following snippet ui_version="2" and paste it between languageid="1" and ng-version="7.1.0". This snippet allows enabling the newest version of White Label Channel Manager in your website.
-
Add the following external scripts and styles within the <head> tags of your page.
<base href="/"> <link href='https://fonts.googleapis.com/css?family=Open+Sans' rel='stylesheet' type='text/css'> <script src="https://ajax.googleapis.com/ajax/libs/jquery/3.4.1/jquery.min.js"></script> <script src="https://cdn.jsdelivr.net/npm/popper.js@1.16.0/dist/umd/popper.min.js" integrity="sha384-Q6E9RHvbIyZFJoft+2mJbHaEWldlvI9IOYy5n3zV9zzTtmI3UksdQRVvoxMfooAo" crossorigin="anonymous"></script> <link rel="stylesheet" href="https://maxcdn.bootstrapcdn.com/bootstrap/3.3.7/css/bootstrap.min.css" integrity="sha384-BVYiiSIFeK1dGmJRAkycuHAHRg32OmUcww7on3RYdg4Va+PmSTsz/K68vbdEjh4u" crossorigin="anonymous"> <script src="https://maxcdn.bootstrapcdn.com/bootstrap/3.3.7/js/bootstrap.min.js" integrity="sha384-Tc5IQib027qvyjSMfHjOMaLkfuWVxZxUPnCJA7l2mCWNIpG9mGCD8wGNIcPD7Txa" crossorigin="anonymous"></script> <link rel="stylesheet" href="https://cdnjs.cloudflare.com/ajax/libs/font-awesome/4.6.3/css/font-awesome.min.css"> - Verify that the White Label Channel Manager displays correctly on your website.
Option 2: One-line script
One-line script is a more streamlined approach using a single script tag to load the application.
Step by step:
- Obtain the subuser token and refresh_token as described in the authorization steps here.
-
Add the following <div> element to your website where you want the White Label Channel Manager to show.
<div id="ruApp"></div> -
Add the script below as the last item within the <head> tags of your website.
<script src="https://new.rentalsunited.com/white-pms-client/script? token=[access_token] &refreshToken=[refresh_token] &languageId=[ID] &uiVersion=2 &ownerId=[ownerId]"> </script> - Replace the placeholders in the script:
- [access_token] - Subuser Access Token
- [refresh_token] - Subuser Refresh Token
-
[ID] - optional; language to be loaded
- 1 English
- 4 French
- 5 Spanish
- 6 Italian
- uiVersion=2 - parameter enabling the newest version
- ownerId - optional; it allows the master account to load the page for a given subuser (Owner ID) and view their inventory and connections. You can obtain the list of Owner IDs through Pull_ListAllOwners_RQ.
- Verify that the White Label Channel Manager displays correctly on your website.