Co-hosts can message the guests through Guest Communication API. This feature ensures timely communication and allows co-hosts to take full ownership of guest interactions when needed.
- Co-host account on Airbnb
- Co-host must be added to the particular listing - here
- Co-host has full access or calendar & inbox permissions - here
- Co-host Airbnb credentials
- Co-host can't have own account in Rentals United connected to Airbnb
Before you start
- Make sure you are logged out from any Airbnb account to prevent breaking the connection in case of logging into the wrong account accidentally.
Add co-host account
Follow the steps below to add a co-host account to Rentals United.
Step by step:
- Go to Guest Planner and open the Control Panel.
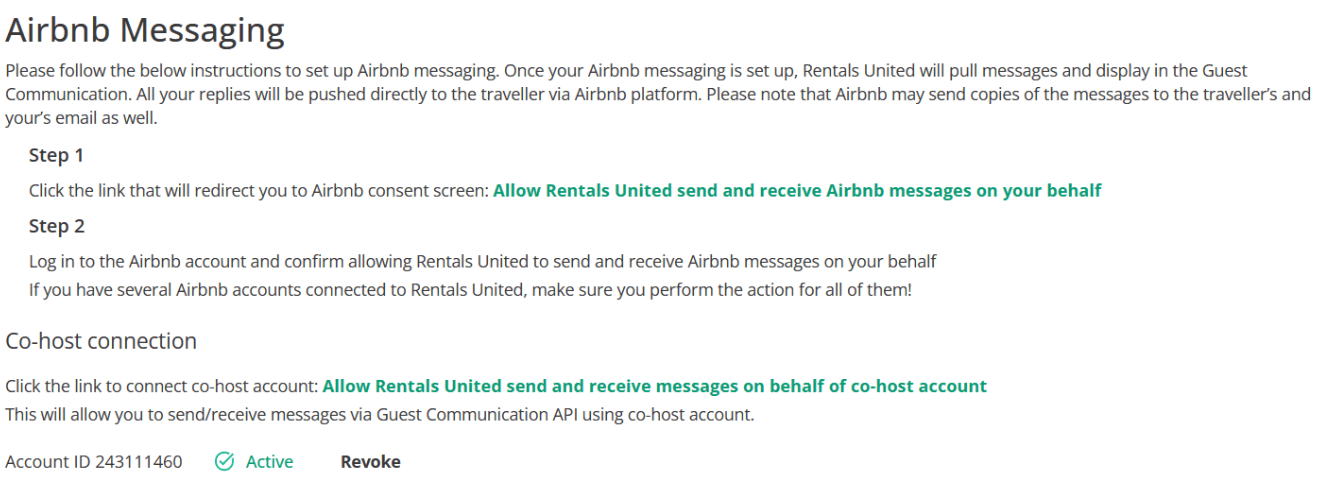
- Scroll down to the "Co-host connection" section and click Allow Rentals United to send and receive messages on behalf of a co-host account.
-
Log in to the Airbnb co-host account. Use the co-host account credentials.
Important:
Logging into the wrong account may severely impact the connection. Make sure that you are logging into the right co-host account in Airbnb.
-
Click Allow to allow Rentals United to access the co-host account.
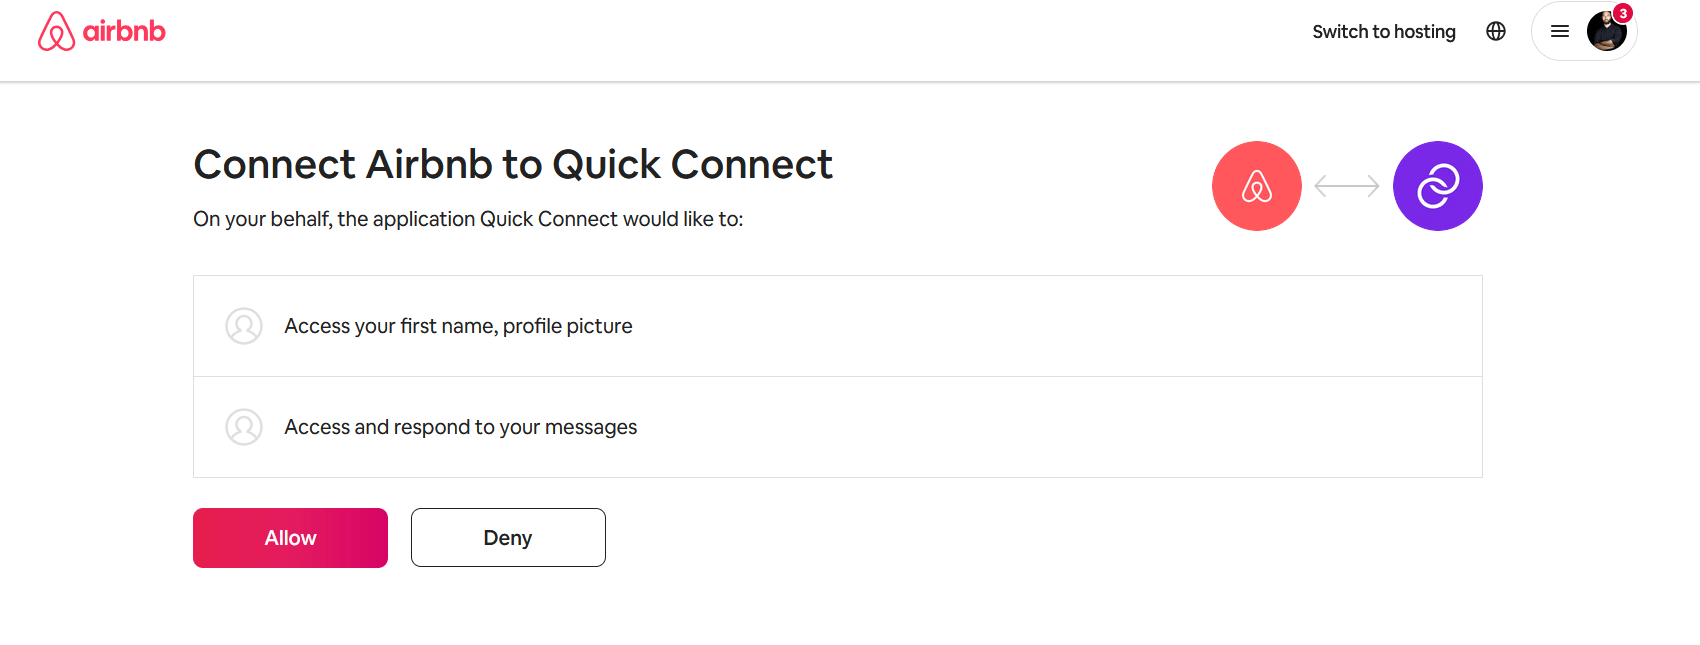
- The co-host account is added to Rentals United.
You can see the new Account ID in the Co-host connection section. The status of this account should be "Active", which indicates that the connection is successful and you can send messages on behalf of your co-hosts.
Send message as a co-host
Follow the steps below to send message on behalf of the co-host.
Step by step:
- Use the GET /api/messaging/threads method to retrieve threads. In response, look for the thread which has
"CommunicationChannel" = "Airbnb"information. - Use the GET /api/messaging/threads/{id}/messages method to retrieve messages for the selected thread ID. In response, you receive the message history.
- Use the POST /api/messaging/threads/{id}/messages/as-cohost/{cohostAccountId} to send a message to the selected thread ID. Use the request format required for a message and provide the following parameters:
-
{id}- thread ID -
{cohostAccountId}- co-host account ID. You can find this ID in Control Panel.
-
Revoke co-host access
Follow the steps below to revoke co-host access.
Step by step:
- Go to Guest Planner and open the Control Panel.
-
Scroll down to the Co-host connection section and click Revoke.
- A confirmation pop-up is displayed. Click Yes, revoke.